Kalshi Pro: What's Different and Should You Switch?
A full Kalshi Pro walkthrough: the market scanner, building a custom canvas, maker vs taker orders, the live tape, and whether to switch.

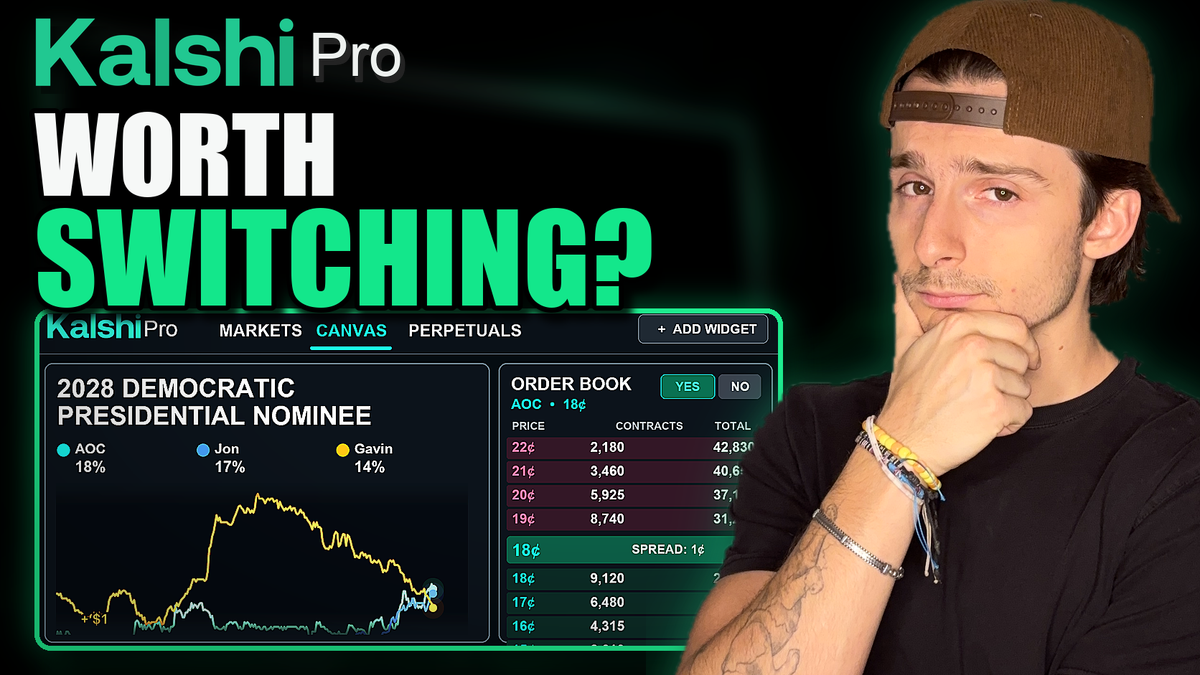
Kalshi Pro takes the regular Kalshi platform and turns it into something that looks a lot more like an advanced trading terminal. A live market scanner, multi-market layouts, deeper order books, and far more control over your open orders.
But more tools does not automatically make a better platform. Pro is only an upgrade if the extra information either saves you time or gives you an edge on what you're actually trading.
This walkthrough covers exactly what changes when you go from the Kalshi Classic dashboard to Pro: how to scan markets, how to build a custom canvas, how to read the order book, and how to manage everything from one screen.
Then we'll run the switch test and answer the real question — should you move to Pro, or are you better off staying on Classic?
Disclosure: the referral link on the video is an affiliate link, and it may earn a commission depending on how active you are after signing up. Signup rewards vary, so check the current terms yourself — and only use the platform if it genuinely makes sense for you.
Table of Contents
- What Is Kalshi Pro?
- Prerequisites: What You'll Need
- Step-by-Step: Using Kalshi Pro
- The Perpetuals Tab
- The Tape: Watching Live Order Flow
- Maker vs. Taker: Why It Costs You
- Common Mistakes to Avoid
- Tips and Best Practices
- Should You Switch to Kalshi Pro?
- Frequently Asked Questions
- The Bottom Line
Key Takeaways
- Kalshi Pro is not a separate account. It's a link at the top of the regular platform, and your event contract and perpetual balances carry over automatically.
- It launched in July 2026 and was still in free beta as of late August 2026, so expect features and labels to change.
- Classic is better for discovery. Pro is better when you already know what you're looking for.
- Four tabs run the platform: Markets, Canvas, Perpetuals, and Portfolio.
- The Canvas tab is the standout feature — a fully custom, drag-and-resize workspace you build yourself.
- Limit orders make you a maker. Market orders make you a taker — and taker fills carry higher fees.
- You can drag a resting order up or down directly on the order book to reprice it.
- Post-only rejects any order that would fill immediately, which is genuinely useful in illiquid markets.
- You earn interest while holding positions, not just on idle cash.
- Deposits, transfers and withdrawals aren't available in Pro — handle those in Classic.
- The Tape shows every live order flowing through Kalshi, filterable by whales, sweeps, long shots or a custom minimum value.
What Is Kalshi Pro?
Kalshi Pro is an advanced interface layered on top of the standard Kalshi platform. It gives you a live market scanner, customizable multi-market layouts, deeper order book visibility, and considerably more control over orders once they're working.
The single most important thing to understand upfront: this is not a second prediction markets account.
Pro is accessed through a link at the top of the regular Kalshi page. Click it and you open a full-screen view of Pro. Your balances for both event contracts and perpetual markets transfer over automatically — there's nothing separate to fund and no transfer step to manage.
It launched in July 2026 and was still running as a free beta at the end of August 2026. Beta labels, features and tools can all change, and almost certainly will over the coming months.
Kalshi Pro vs. Kalshi Classic
The honest comparison isn't "advanced versus basic." It's about what mode you're in when you sit down.
| Kalshi Classic | Kalshi Pro | |
|---|---|---|
| Best for | Discovery and browsing | Executing with intent |
| Information density | More visual, digestible at a glance | Much more data on screen at once |
| Multi-market monitoring | One market at a time | Custom multi-widget layouts |
| Order control | Standard | Drag-to-reprice, post-only, one tap |
| Deposits and withdrawals | Yes | Not currently available |
Classic is genuinely better in discovery mode. When you're browsing with no particular intention, just seeing what's available, it's more visual and puts the right information at your fingertips.
Pro puts more at your fingertips — but you need a reason to be looking at it. You have to have a way to synthesize all that extra information into an actual decision. Pro is only better if it saves you time or gives you an edge. Otherwise it's just more screen to read.
The Four Tabs
The Pro interface looks confusing at first glance, but it's really just four sections:
- Markets — the scanner, search and filtering, plus the Tape
- Canvas — your custom workspace, and the feature most people will get the most from
- Perpetuals — a full advanced trading view with TradingView charts, order book, executions, and open positions, orders and history along the bottom
- Portfolio — your portfolio over time, positions across both perpetuals and prediction markets, and P&L
Prerequisites: What You'll Need
- An existing Kalshi account. Pro isn't a separate signup — if you have Classic, you have Pro.
- A funded balance in Classic. Event contract and perpetual balances transfer automatically, but you'll need to deposit through Classic since Pro can't do it.
- A desktop. This is a multi-panel terminal interface. It is not a mobile experience.
- A rough idea of what you want to trade. Pro rewards intent and punishes aimless browsing.
- About 20–30 minutes to build your first canvas and get comfortable with the order panel.
- Skill level: approachable if you already understand Kalshi Classic. If you don't, learn the standard platform first — Pro assumes you know how event contracts work.
Step-by-Step: Using Kalshi Pro
Eight steps from opening Pro to a filled position and a portfolio review.
Step 1 — Open Pro from Classic
From the regular Kalshi platform, find the Pro link at the top of the page and click it. You'll get a full-screen view of Pro with your balances already carried over.
No new account, no separate funding, no transfer.
Step 2 — Scan and Filter for a Market
The Markets tab is your scanner. In this walkthrough the target was a Federal Reserve market — specifically the September 2026 meeting, covering whether the Fed cuts, holds, or hikes.
The fastest route:
- Type your topic into the search bar — in this case, "Federal Reserve"
- Sort by 24-hour volume, which pushes the markets with the most volume and deepest liquidity to the top
That alone found the right market in seconds. But there are several other filters worth knowing:
| Filter | What it does |
|---|---|
| Categories | Sort by market category — would have found the same Fed market |
| Live | Markets happening right now, useful for live sporting events |
| Has liquidity rewards | Markets that reward you for placing resting orders that improve liquidity |
| Custom filter | A filter panel on the right for building a more dialed-in view |
That liquidity rewards filter is worth a second look. Kalshi's own description is that it rewards you for placing resting orders that improve market liquidity — meaning a limit order that may never actually fill still earns you something for contributing depth to the book.
The goal here isn't finding a winning trade. It's finding the market you want quickly and effectively.
Step 3 — Read the Market Detail View
Click into a market and Pro gives you significantly more than Classic does.
At the top sits the ticker, which you can copy or use to open the same market in Classic. Alongside it:
- Add to canvas — sends this market to your custom workspace
- The upcoming date for the market
- Related events — effectively a small news scanner for context
- Your fills on this specific market
- Market rules — how the market resolves depending on the outcome
The chart defaults to a one-day view, with live price action plus one-month and all-time options.
Important detail: the chart shows one strike at a time. Click "hike 25 basis points" and you get a different chart. Click "cut 25 basis points" and you get another. Each outcome has its own price history.
In this example the selection was Fed maintains rate, last trading at 68 cents. The order book showed orders stacking up on the 68 and 69 side with noticeably fewer on 67 — exactly the kind of read you don't get from Classic.
Below that sits a full order panel for adding to your position, plus a summary of your current position if you already hold one.
Step 4 — Build Your Canvas
This is where Pro earns its keep. There are two ways in: the Add to canvas button on a market, or the Canvas tab directly.
Using the first route, you'll get an "added to canvas" confirmation in the bottom right with a View link. Click it and your market appears as a widget.
From there, build the workspace:
- Delete what you don't want. The starter canvas may come with widgets you don't care about — click the X to remove them.
- Drag widgets to reorder them anywhere on screen.
- Add a chart so you can see price action alongside the market.
- Resize anything by dragging its edges.
- Use Add widgets in the top right to bring in positions, orders and fills. New widgets may appear below your current view — collapse the menu and drag them where you want.
- Rename the layout by double-clicking the tab in the top right. The default is "starter view."
- Click the plus button to open a brand new page and build a canvas from scratch.
A practical layout that works well:
- Left — search, for pulling up other markets
- Middle — the ticker you're actively trading
- Right — your positions
- Far right — order entry
There's also a settings tab that controls how everything looks, including a toggle for drag and resize. Worth exploring on your own once the basic layout is in place.
To add another market, search for it in the panel and click — it opens with the same structure. Click a market's name at the top and you can swap it out entirely, pulling from your watchlist, predictions, or perps.
Is this necessary for one market? No. But if you want to monitor the Fed alongside Bitcoin, Ethereum and Solana while trading perpetuals, this is exactly where Pro separates itself.
Step 5 — Place a Limit Order as a Maker
One nice touch: as you click between strikes, the trading panel on the right updates to match. Select "Fed maintains rate" and the panel reflects that. Switch to "Fed hikes 25 basis points" and it follows.
The order panel defaults to a limit order, and you can toggle the sizing between shares and dollars.
Understanding the distinction matters:
- Limit order = maker. You set your price and contribute depth to the order book.
- Market order = taker. You take whatever price is available right now.
For this example: buy, Yes side, 50 shares at 65 cents — deliberately below the market so it wouldn't fill immediately. There's an auto button for pricing, left unused here.
Then set your expiration:
| Option | Behavior |
|---|---|
| Event start + 2 / 5 / 10 minutes | Expires relative to event start |
| End of day today | Cancels at day's end |
| Immediate or cancel (IOC) | Fills what it can now, cancels the rest |
| Custom time | Your own expiry |
| Good till canceled | Rests until you cancel it |
Two toggles worth knowing:
- Post-only — will only place the order if it can rest on the book. If it would fill immediately, the order gets rejected. In illiquid markets this is a genuinely good toggle for guaranteeing you get your price.
- One tap — skips the review screen entirely and submits immediately. Faster, with less protection against a misclick.
Before submitting, the panel shows your cost, your max payout, and the interest you'll earn on the position. That last one is easy to miss: you earn interest while holding positions, not just on your cash balance. You're effectively getting paid to hold until expiration — and if the market resolves your way, you win twice.
Click Review buy, then submit. Or with one tap enabled, it goes straight through.
Step 6 — Manage a Resting Order
This is the single best piece of order control in Pro.
Once submitted, the order book shows "orders 1" — one resting order, in this case 50 shares. And here's the part that doesn't exist in Classic:
You can drag the resting order up or down directly on the order book. Grab it, move it, and Pro asks you to confirm with a checkmark or reject with an X. In this walkthrough the order moved down to the 64 level with a single drag.
At the bottom of the screen you have positions and orders tabs. Your resting order appears under orders, where you can edit the contract size or the price point directly. The X cancels it outright.
Cancel the order and the book updates to "orders 0" — nothing resting.
Step 7 — Place a Dollar-Based Order
The second order in this walkthrough took the opposite approach. Switching the panel from shares to dollars lets you say "I have this much money, put it on this outcome" rather than calculating contracts.
The setup:
- Available balance: $50.01, allocated in full
- One tap: enabled, skipping review
- Average price: 68 cents — effectively a market order
- Payout if correct: $71.92, for roughly $21.91 of profit
Submit, and it filled immediately.
Pull up the fill history and you get the full record — timestamp, contracts, price point, and critically, your role on the fill. This one came back as taker, because it took the available price rather than resting on the book. A fee was applied accordingly.
The lesson he draws from it is the honest one: with more patience, a limit order would have been the better choice. You save on fees and you get the price you actually wanted.
Step 8 — Check the Portfolio Tab
The Portfolio tab gives you the full account view.
In the prediction markets section you get realized P&L over a selectable window (one month here) plus every market you're currently trading. The position in this example: 134 contracts at an average price of 66.83, with cost basis and the payout if the market resolves Yes.
One current limitation: the top right has options for deposits, transfers and withdrawals, but they aren't functional in Pro yet.
That's not a real problem, since Pro is connected to your Classic account. Go back to Kalshi Classic → Portfolio → Funds, and deposit, transfer or withdraw as normal.
The takeaway on positioning: Pro is built for the active trading component, not account maintenance.
The Perpetuals Tab
The Perpetuals tab brings the Pro treatment to Kalshi's perpetual futures, with charts supplied by TradingView.
Open a position — a SOL position in this case — and the chart displays your stop loss, your average entry price, and your take profit once you zoom out far enough to see it.
If perpetuals are new to you, learn that product properly before trading it here. Funding, margin, leverage and liquidation all behave differently from event contracts, and Pro's interface won't teach you those mechanics — it just displays them.
The Tape: Watching Live Order Flow
Next to Active Markets on the Markets tab sits a Tape option, and it's the most interesting thing in Pro that nobody asks about.
The Tape shows every live order flowing through Kalshi right now, streaming in as it happens. You can sort by market or category.
The interaction detail that makes it usable: it pauses on hover. An indicator in the top right confirms "paused on hover," and the moment you move off the list it resumes streaming automatically. So you can pause, scroll back through what just happened, click into any market for a closer look, and trade it if you want.
The Filter Presets
On the right side of the Tape there are four presets:
| Preset | What it shows |
|---|---|
| Whales | Minimum value of $500 |
| Sweeps | Minimum quantity of $500 |
| Long shots | Prices between 0 and 15 cents |
| Favorites | Based on your favorites tab |
You can also set your own thresholds. Setting a custom minimum value of $5,000 produces a live feed showing only trades above that size — and you can see exactly what each trader did.
Following the Big Money
One example from the feed: a Fulham vs. Chelsea winner market, with the game starting at 3 p.m. Eastern. Someone put roughly $8,300 on Chelsea, buying Yes at 49 cents.
That's a real, actionable read on where size is going. As the sports season ramps up, you could scan the tape before NFL games and notice that a lot of big money has piled into one particular outcome.
What you do with that is your call — follow the big money, or fade it. Neither is a recommendation. But having a live, filterable view of institutional-sized flow is a genuine informational advantage, and it's free in the beta.
Maker vs. Taker: Why It Costs You
This distinction runs through everything above, so it's worth isolating.
| Maker | Taker | |
|---|---|---|
| Order type | Limit order that rests on the book | Market order, or a limit that fills instantly |
| What you're doing | Adding liquidity | Removing liquidity |
| Price control | You set it | You accept what's available |
| Fees | Lower | Higher |
| Fill certainty | May never fill | Immediate |
| Liquidity rewards | Eligible | Not eligible |
The practical rule: if you're not in a hurry, rest a limit order. You pay less, you get the price you wanted, and in markets flagged for liquidity rewards you may earn something extra for the privilege.
Use a taker fill when execution certainty matters more than the fee — a fast-moving live market, or a position you need on right now.
Common Mistakes to Avoid
- Assuming Pro needs separate funding. It doesn't. Balances carry over automatically from Classic.
- Trying to deposit or withdraw in Pro. Those functions aren't live yet — go back to Classic for anything involving money movement.
- Using market orders by default. Every taker fill costs you more than a resting limit order would have.
- Leaving one tap on while you're still learning. It skips the review screen entirely, which is great for speed and terrible for catching a misclick.
- Reading the wrong chart. Each strike has its own price history. Clicking a different outcome changes the chart underneath you.
- Building an elaborate canvas for one market. If you trade a single market at a time, the canvas is overhead, not an upgrade.
- Treating Pro as a research tool. Classic is better for browsing. Pro is better once you know what you're after.
- Forgetting it's still in beta. Features and labels are actively changing.
Tips and Best Practices
- Sort by 24-hour volume first. It's the fastest way to surface the markets with real liquidity.
- Use post-only in illiquid markets to guarantee you rest on the book instead of crossing the spread.
- Drag your resting orders rather than cancel-and-replace. It's faster and it's the best interaction in the platform.
- Name your canvases. Double-click the tab and label them by use case — one for Fed markets, one for crypto perps, one for sports.
- Check the market rules tab before trading. Resolution criteria matter more in prediction markets than almost anywhere else.
- Watch the related events panel for context you'd otherwise have to leave the platform to find.
- Set a custom tape filter above the $500 whale preset. $5,000 surfaces genuinely meaningful flow.
- Remember you're earning interest on open positions, which changes the math on holding to expiration.
Should You Switch to Kalshi Pro?
Here's the simple verdict.
Use Kalshi Pro if:
- You want to monitor several markets at once
- You want more detailed information on the markets you're actively trading
- You care about order control — resting limits, repricing on the book, post-only
- You want access to the tape and live order flow
- You're trading perpetuals and want proper charting
Stay on Kalshi Classic if:
- You mostly browse and discover rather than execute with a plan
- You trade one market at a time
- You do your research off-platform and just need to place the trade
- You don't need the extra information density
The mobile app is also completely fine for this second group. There's no penalty for staying on Classic — it's a genuinely good interface for what it does.
Frequently Asked Questions
What is Kalshi Pro?
An advanced trading interface layered on the standard Kalshi platform, offering a live market scanner, customizable multi-market layouts, deeper order books, and more control over open orders. It's accessed via a link at the top of the regular Kalshi page.
Do I need a separate account for Kalshi Pro?
No. Pro is not a second prediction markets account. Your event contract and perpetual market balances transfer over automatically, so there's nothing separate to fund.
Is Kalshi Pro free?
It launched in July 2026 and was still running as a free beta as of late August 2026. Beta terms, features and labels can change.
What's the difference between Kalshi Pro and Kalshi Classic?
Classic is more visual and better for discovery and casual browsing. Pro packs far more information onto the screen and is better once you know what you want to trade. Pro adds a canvas builder, deeper order books, the tape, and advanced order controls.
Can I deposit or withdraw money in Kalshi Pro?
Not currently. The options appear in the Portfolio tab but aren't functional. Go back to Kalshi Classic, open your portfolio, and use the funds section to deposit, transfer or withdraw.
What is the Canvas tab?
A fully customizable workspace where you add, drag, resize and arrange widgets — markets, charts, positions, orders and fills — into a layout you build yourself. You can name layouts and create multiple ones from scratch.
What is the difference between a maker and a taker on Kalshi?
A maker places a limit order that rests on the book and adds liquidity, paying lower fees. A taker uses a market order and takes the available price immediately, paying higher fees. Some markets also offer liquidity rewards for resting orders.
What does the post-only toggle do?
It only places your order if it can rest on the book. If the order would fill immediately, it gets rejected. This is useful in illiquid markets when you want to guarantee your price rather than cross the spread.
Can I edit an order after placing it on Kalshi Pro?
Yes. You can drag a resting order up or down directly on the order book and confirm the new price, or edit the contract size and price from the orders tab at the bottom of the screen. The X cancels it.
What is the Tape on Kalshi Pro?
A live feed of every order flowing through Kalshi as it happens. It pauses when you hover so you can scroll back, and it filters by presets — whales at $500 minimum value, sweeps at $500 minimum quantity, long shots between 0 and 15 cents, and your favorites — or by a custom threshold you set.
Do you earn interest on Kalshi positions?
Yes. The order panel displays interest earned on the position, meaning you earn while holding positions rather than only on idle cash.
The Bottom Line
Kalshi Pro is a legitimate upgrade in capability, but it's not automatically an upgrade for you. The platform gives you a scanner, a custom canvas, deeper order books, drag-to-reprice order management, a live tape, and proper perpetuals charting — all without a separate account or a separate deposit.
The question is whether you'll use any of it. More information only helps if you can synthesize it into a decision. If you trade one market at a time after doing your research elsewhere, Classic already does everything you need and does it in a friendlier way.
If you're actively monitoring several markets, care about the price you're getting, or want to see where size is flowing before you commit, Pro is worth the setup time.
Four things to do on your first session:
- Build one canvas around a market you actually trade, and name it
- Place a resting limit order and drag it on the book to see how the repricing works
- Open the tape and set a custom filter above the $500 whale preset
- Remember to go back to Classic for anything involving deposits or withdrawals
And if perpetuals are the reason you're considering Pro, learn that product properly first — funding, margin, leverage and liquidation all deserve their own study before you put money on one.
Got questions about a specific part of the platform? Drop them in the comments on the video.
Watch the full video tutorial here: