TradingView Paper Trading: Your First Trade in 5 Minutes
Open a free TradingView paper trading account and place your first trade with a stop and target. Order types, shorting, and bar replay covered.

In the next five minutes you can open a free TradingView paper trading account and place a real trade — with a take profit and a stop loss — without risking a single dollar.
I've been using TradingView for just over five years and explored almost every corner of the platform. The paper trading side is genuinely one of the most useful features it offers, and most tutorials barely scratch it.
This guide covers what those tutorials skip: how to set a realistic account balance, how to configure commissions so your practice resembles real trading, how to short sell, and how to trade days that already happened — weeks or even months ago.
Let's open the account.
Table of Contents
- What Is TradingView Paper Trading?
- Prerequisites: What You'll Need
- Step-by-Step: Your First Paper Trade
- The Commission Lesson
- The Other Order Types
- Trading From the Depth of Market
- How to Short Sell
- Bar Replay: Trade Last Month's Chart
- Should You Upgrade?
- Common Mistakes to Avoid
- Frequently Asked Questions
- The Bottom Line
Key Takeaways
- Paper trading is free and requires no broker connection — just a TradingView account.
- Reset your balance to something realistic. It's under your account name, not trading settings.
- You must click Confirm to lock in a take profit or stop loss, or they aren't active.
- Commissions are configurable and will quietly turn a winning trade into a loss if you ignore them.
- Take profits can fill outside regular hours; stop losses cannot — matching how most brokers behave.
- One-click trading removes the confirmation window, which matters for scalping practice.
- Reverse flips long to short instantly but removes your existing exits.
- Bar replay lets you trade historical days, including on weekends when markets are closed.
- You can export your trade list to a spreadsheet and use it as a journal.
- Minute and tick data in bar replay requires a paid plan — free gives you daily and higher.
What Is TradingView Paper Trading?
Paper trading is a simulated account that behaves like a real brokerage account — real charts, real live prices, real order types — but with fake money.
TradingView builds it directly into its charting platform, which means you practice in the exact interface you'd use with a live broker connected. That's the part that makes it carry over. You're not learning a toy simulator; you're learning the order panel you'll actually use.
The feature costs nothing and needs no broker account.
Prerequisites: What You'll Need
- A free TradingView account. No payment details required.
- About 5 minutes for your first trade, or 20–30 to work through everything here.
- No brokerage account. Paper trading is entirely self-contained.
- No prior experience. This guide assumes none.
- Optional: a sense of which broker you'll eventually use, so you can match its commission and leverage settings.
Step-by-Step: Your First Paper Trade
Step 1 — Create a Free Account
Head to tradingview.com and click Get started for free, or use Get Started in the top right.
You'll see a list of paid plans. Disregard them. The platform is free until you personally find value in something paid — there's no reason to decide that now.
Click Sign up and register with Google or an email address.
Once you're in, go to Products → Supercharts. That's the main charting page and where everything below happens.
On the free plan you'll have limited features, but you can still customize the layout. Keeping the watchlist tab open on the right is a useful default so you can see what you follow at a glance.
Step 2 — Open the Paper Trading Panel
There are two similar-looking paths here, and only one is what you want.
In the top right there's a trade icon — hovering says "trade with your broker." Clicking it lists real brokers you can connect to trade live through TradingView's charts. That's not what we need.
Instead, go to the top left and click the paper trading icon. Same destination, but with simulated money.
A panel opens along the bottom showing your account balance and any open positions. A fresh account starts clean.
Step 3 — Set a Realistic Balance
This is the step people hunt for and can't find, so here's exactly where it lives.
It is not in the dropdown next to trading settings. That menu controls how orders behave when you place them — useful later, but not this.
It's under your account name. Click the dropdown there and you'll find:
- The option to create additional paper trading accounts — handy if you want one for crypto and one for stocks, named separately
- A gear icon for Account settings
Inside account settings you can change the account name, set leverage, configure a commission for futures and options per contract, and set a general commission on a fixed or percentage basis.
The one you want is Reset account.
Reset to any balance you like. Setting $1,000 instead of the default is the single most valuable thing you can do here — practising with $100,000 when you'll trade with $1,000 teaches you position sizing that won't transfer.
While you're there:
- Margin control enables margin calls and liquidations if you cross those thresholds
- Leverage can be set per asset class — stocks from 1x to 4x, or a custom figure
Match these to the broker you plan to use with real money. If you don't know yet, ignore leverage entirely — the goal right now is getting reps in.
Step 4 — Place a Market Order
Pick a ticker and go to the Trade button in the top right. Hovering shows "place an order via ticket or DOM."
Two interfaces open:
- The standard order panel — a conventional order ticket
- The DOM (depth of market), also called a price ladder
Start with the standard panel. Set your quantity using the shares field — five shares is a fine first test.
Drop to a shorter timeframe before you trade. On a one-day chart you'll see almost no movement. A five-minute chart lets you actually watch the position breathe.
Click market buy and you're in immediately. The bottom panel now shows your position: side (long), quantity, average fill price, and a live P&L that moves with price.
Step 5 — Set and Confirm Your Exits
Two lines appear on your chart: TP (take profit) and SL (stop loss).
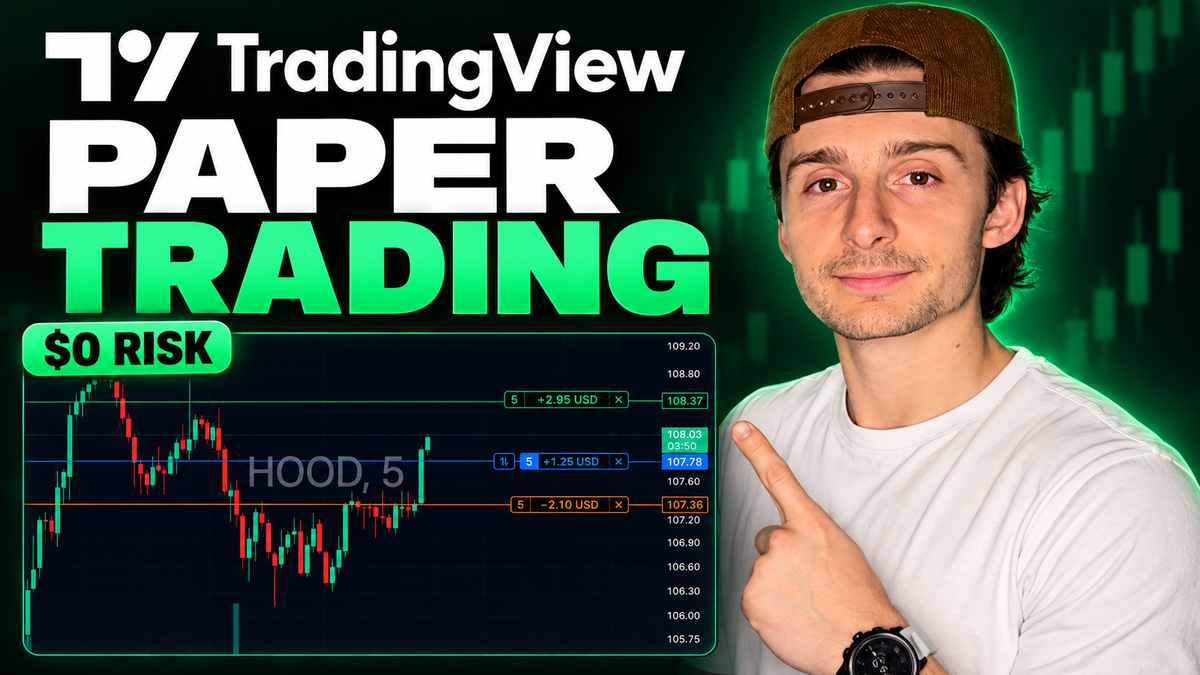
Grab them and drag. Pull the take profit to your target, drop the stop loss below the recent candle. TradingView immediately shows your risk and reward in dollars — for example, risking $2.10 to make $2.95.
Hover over either line and you get two more useful readouts: how many ticks price needs to move, and the percentage move required. A target might show that the stock only needs to rise 0.55% to hit.
Here is the mistake that will cost you: you must click Confirm to lock these in. Until you do, they are not active orders.
I've made this mistake myself. The visual tell is saturation — unconfirmed exits appear dulled out, and once confirmed they become fully visible.
One setting worth understanding sits under extra settings: fill take profit outside of RTH (regular trading hours). Enable it and take profits can fill outside the 9:30 a.m. to 4:00 p.m. window.
Stop losses cannot fill outside regular hours, and that's deliberate. Many real brokers work the same way — thin pre-market and after-hours activity can produce enormous price spikes, and allowing stops to trigger in that environment would hurt far more traders than it helps.
Step 6 — Close the Position
To adjust an exit, drag it on the chart or edit it in the order panel. The X deletes it. Remove both and you're trading naked — no target, no stop.
To close the position, click the X icon on the position itself. You'll be offered a partial close — selling only part of your shares — or closing the whole thing.
Click Close position and you're flat.
The Commission Lesson
Here's a result worth sitting with. After that first trade, the realized P&L came back at down 85 cents — even though price moved up after entry.
Balance history explains it, and this is the most instructive screen in the whole platform:
| Event | Amount |
|---|---|
| Entry commission | −$1.00 |
| Trade result | +$1.15 |
| Exit commission | −$1.00 |
| Net | −$0.85 |
The trade was right and the result was a loss. $1.15 of profit couldn't cover $2.00 of round-trip commissions.
That's not a simulator quirk — it's exactly what happens in a real account when you trade small size against fixed commissions. Most paper trading tools hide this. TradingView lets you configure it, which means you can make your practice honest.
To adjust, go to your account, hit the gear icon, and change the commission settings. Turning the fixed $1 off makes subsequent examples cleaner, but leaving it roughly matched to your real broker is the more useful choice once you're past learning the buttons.
The Other Order Types
Limit Orders
A limit order says: I won't pay worse than this price.
Set your limit below current price — it appears as a blue dashed line on the chart — and optionally attach a take profit and stop loss. Set your time in force so the order stays open until it fills or expires.
Click buy and nothing happens. No position opens. You're waiting for price to come to you.
If it never arrives and your time in force is set to a week, the order simply cancels at the end of that week.
Stop Orders
A stop order is the opposite trigger: once price crosses this threshold, get me in.
Place it above a recent high — say a threshold at $108.09 to catch a breakout over $108.10 — and attach exits as normal.
When price crosses that level, a market order fires automatically and you're in the position. If price never gets there, nothing happens and the order expires with your time in force.
Trading From the Depth of Market
The DOM is where a lot of traders prefer to work, because it's considerably more visual than the order ticket.
Hover over the ladder and a very fine dashed line appears on the chart showing exactly where your order would sit. The ladder labels orders as limits above and below current price, with your quantity set at the bottom.
There are also buy market and sell market buttons at the bottom for instant entries.
The key behaviour to internalise:
- Click below current price → places a limit order and waits
- Click above current price on the bid side → fills you at market immediately
Clicking a price opens a confirmation window showing what your order will look like before it goes in.
Turning On One-Click Trading
That confirmation window gets slow if you're practising fast entries. To remove it:
Go to your paper trading account → trading settings → turn on one-click trading.
The same settings panel also offers execution marks on your charts, notifications, and sounds when fills happen — an alarm, a beep, and similar. The sounds are a matter of taste; plenty of people turn them off.
With one-click on, clicking a price places the order instantly with no confirmation. Highly recommended if you're practising scalping — as long as you know what you're doing, because there's no longer anything between your click and a live order.
One consequence to watch: with one-click enabled, dragging your take profit or stop loss no longer requires confirmation either. They go live the moment you move them.
One more DOM behaviour worth knowing: you can set a target as a sell limit directly on the ladder. But if you already have a take profit or stop loss attached to the position, that creates an additional order — which could flip you short depending on how the fills land.
How to Short Sell
Shorting works the same way as going long, just inverted.
Place a sell limit above current price. When price reaches it, you're filled short — the position shows as negative shares at your average price.
The thing that confuses people: on a short, your take profit goes below your entry and your stop loss goes above it. Profit comes from price falling, so the target sits underneath.
TradingView still displays the risk and reward in dollars — risking $1.35 to make $1.45, for instance — which makes the inverted logic much easier to read.
Flatten, Reverse and Cancel All
Three buttons at the bottom of the DOM handle position management:
| Button | What it does |
|---|---|
| Flatten | Closes your position entirely, taking you to zero |
| Cancel all | Cancels open orders — including your TP and SL — but leaves the position open |
| Reverse | Flips your position from long to short, or short to long |
Reverse is the fast one. If you're short five shares and change your mind, one click puts you long five shares. There's also a reverse icon attached directly to the position itself.
The catch: reversing removes your take profit and stop loss. You'll need to set new ones immediately, because you're now in an unprotected position facing the opposite direction.
And note the distinction on Cancel all — it kills your pending exit orders but not your position. That's easy to misread in the moment.
Bar Replay: Trade Last Month's Chart
This is the feature that makes TradingView paper trading genuinely different from every other simulator.
You can trade days that already happened.
Click the replay icon at the top — two arrows pointing backwards — then Start new. Scroll back through the chart and pick any point in history. For instance, September 17th at 10:35 a.m.
The chart resets to that moment, and the bottom bar lets you play it forward at adjustable speed.
From there you're in replay trading, which works identically to normal paper trading. Same trade button, same ticket and DOM, same order types, same exits.
What makes it powerful:
- Pause mid-move to analyse before deciding
- Change the replay speed from 0.5x up to 3x and beyond
- Change the chart interval — set a 1-minute interval while watching 5-minute candles and you get movement every minute, which is far closer to how price actually unfolds
- Trade on weekends or any time markets are closed
- Replay days you missed, or days you want more reps on
A note on speed settings from experience: dropping the interval to 1 second gives you very granular action inside each candle. Setting it to 5 minutes makes each candle complete at once and the chart races — which isn't how price actually feels in real life. The finer interval is better practice.
Under replay trading there's also a settings dropdown where you can set your initial starting capital and commission — simpler than the main account settings, but enough to keep it realistic.
Exporting Your Trades
After a replay session you get a full list of your trades, and crucially, you can export it.
That gives you a spreadsheet file you can use as a trading journal or log — review it manually, run it through AI for analysis, or do whatever you like with it.
If you'd rather not manage that in a spreadsheet, a dedicated journal like TradeZella will take the same data and handle the analysis for you — win rate, average loss, drawdown, and which setups are actually working.
For anyone serious about improving, this closes the loop. Practise, export, analyse, adjust.
The Free Plan Limitation
Here's the honest constraint on bar replay.
On the free plan, you only get historical data by day and higher timeframes. Minute, second and tick data in bar replay require a paid plan.
That's a meaningful limitation if you intend to practise intraday trading specifically, since the whole value is in granular replay. For swing trading practice on daily charts, free works fine.
Should You Upgrade?
Two pieces of advice here, and both of them reduce affiliate commissions rather than increase them — which should tell you something about how seriously to take them.
First: don't upgrade because someone else has a paid plan. I run Premium, and I run it for specific reasons — there are features across the tiers I genuinely use every day, and I pay for it out of my own pocket.
That says nothing about what you need.
The right approach: start on free. As you hit paywalls — and you will, as you want more features — ask yourself two questions. Do I actually need this? Would it genuinely help me? If the answer is yes and the price feels worth it, upgrade then.
Second: if Black Friday is anywhere near, wait for it. TradingView runs a substantial annual sale with heavy discounts across Essential, Plus, Premium and Ultimate. Higher tiers get discounted more, lower tiers less, but all of them are meaningfully cheaper.
The optimal play if you want a paid plan: stay free or pay monthly now, then upgrade to an annual plan during the Black Friday window.
If you do decide to upgrade, the referral link saves $15 off any plan — which conveniently covers the Essential plan, and more than a month of it if you're buying annually.
Common Mistakes to Avoid
- Forgetting to click Confirm on your take profit and stop loss. Dulled-out lines are not live orders.
- Leaving the default balance instead of resetting to something you'd actually trade.
- Ignoring commissions. A correct trade can still lose money on round-trip costs.
- Looking for the balance reset in trading settings. It's under your account name.
- Expecting stop losses to fill outside regular hours. They won't, by design.
- Reversing a position and forgetting your exits are gone.
- Confusing Cancel All with Flatten. One kills your orders, the other kills your position.
- Practising on a one-day chart and wondering why nothing moves.
- Using one-click trading before you're comfortable — there's no safety net between click and order.
Frequently Asked Questions
Is TradingView paper trading free?
Yes. Paper trading is available on the free plan with no broker connection required. The only limitation is that bar replay on free gives you daily and higher timeframes — minute, second and tick data need a paid plan.
How do I change my paper trading balance on TradingView?
Click your account name in the paper trading panel — not the trading settings dropdown — then the gear icon for account settings, then Reset account. From there you can set any starting balance you want.
Why did my winning paper trade lose money?
Almost certainly commissions. A $1 commission on entry and exit means a $1.15 gain becomes an 85-cent loss. You can adjust or remove commission settings in your paper trading account settings.
Why aren't my take profit and stop loss working?
You probably didn't click Confirm. Until you confirm, the lines appear dulled out on the chart and are not live orders. Once confirmed, they become fully saturated.
Can you short sell in TradingView paper trading?
Yes. Place a sell limit above current price, or use Reverse to flip an existing long. On a short, your take profit sits below your entry and your stop loss above it.
What is bar replay trading?
A feature that rewinds the chart to any historical point and lets you trade it forward at adjustable speed. It works identically to live paper trading, which means you can practise on past days, missed sessions, or on weekends when markets are closed.
Can I export my paper trades?
Yes. Replay trading produces a trade list you can export to a spreadsheet, making it usable as a trading journal or as input for further analysis.
What is one-click trading?
A setting that removes the order confirmation window so clicks place orders instantly. It's found under your paper trading account's trading settings and is particularly useful for practising fast entries — though it also means dragged take profits and stop losses go live without confirmation.
Why can't stop losses fill outside regular trading hours?
Because pre-market and after-hours sessions have thin activity and can produce dramatic price swings. Allowing stops to trigger in those conditions would hurt more traders than it would help, which is why TradingView and many real brokers both restrict it.
Should I pay for TradingView to paper trade?
Not initially. Start free, and only upgrade when you actually hit a limitation that matters to you — most commonly minute-level data in bar replay. If you do upgrade, Black Friday brings substantial discounts across every tier.
The Bottom Line
TradingView paper trading is the most practical way to learn an order panel without paying tuition to the market. Real charts, real prices, real order types, fake money.
The five things that make practice actually transfer:
- Reset your balance to what you'd genuinely trade with
- Set commissions to match your intended broker, and watch how they change results
- Always confirm your take profit and stop loss
- Learn the DOM, since most serious execution happens there
- Use bar replay to compress months of practice into an afternoon
The commission lesson is the one that sticks. A trade that moved in your favour and still lost money is the most useful 85 cents you'll ever not lose — and you'd never learn it from a simulator that pretends trading is free.
Open a free account and place one trade today. You can start with TradingView here — the free plan covers everything in this guide except minute-level bar replay, so there's nothing stopping you from getting your first reps in right now.
Watch the full video tutorial here: